So, here’s the backstory.
Shortly after my dad passed away in 2014 (!), my mother gave me the truck that belonged to my him. It’s a glorious 2004 Ford Ranger that he really loved. At the time I didn’t think that I would need a truck, but as it turns out it has been quite a useful vehicle. Here is a shot of my son and me spreading a bed-load of mulch:
I don’t drive the truck everyday, but the Wife and I drive separately to work at least once each week - and on those days I take the truck. This provides me about 90 minutes of time in the cab (45 minutes to- and 45 minutes from work), and the factory stereo is really sub-par. So recently I decided that I was going to upgrade to a nicer head unit (with the future possibility of making an upgrade to nicer speakers).
I picked out a new Pioneer FH-S501BT head unit because it was reasonably priced, and had Bluetooth capability (one major criterion for me was the ability to connect my phone to listen to music on my commute). Here’s the step-by-step project that I undertook...
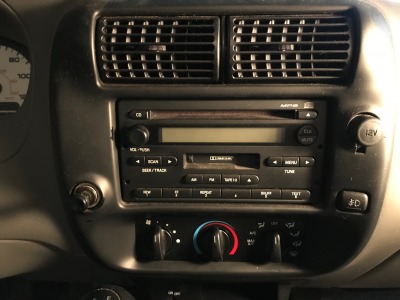
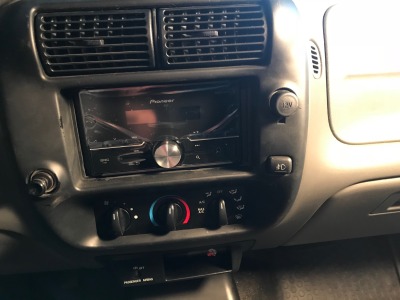
First, here is what the factory deck looks like:
So to start, I ripped it out (gently, of course). The bezel around the factory stereo has a couple of hidden screws, and once they were removed the whole thing popped off quite easily.
Then, I carefully slid the stereo out of the dash:
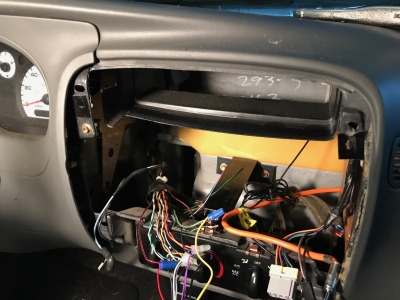
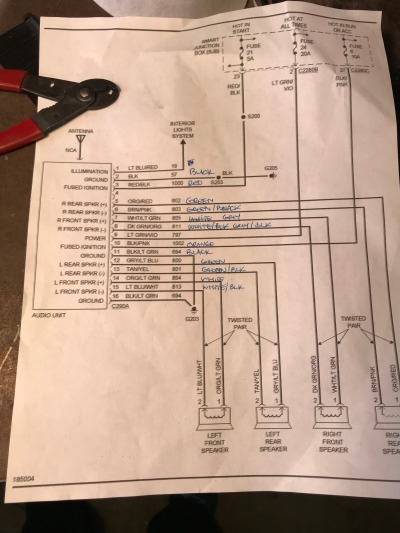
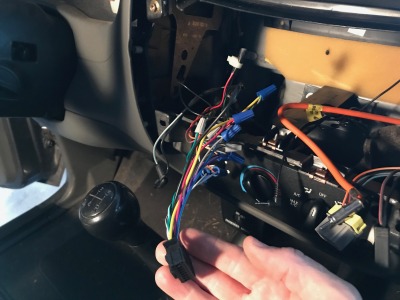
Once I had the old stereo out, I had to figure out what the purpose was for each wire in the dash. To accomplish this, I used my dad’s old analog multimeter to determine which wires held current from the battery - one for a constant current, and one for when the engine was running. Once I had that figured out, I used a wire diagram that I found online:
After mapping all of the wires, I connected each one to the wire harness that came with the new Pioneer head unit:
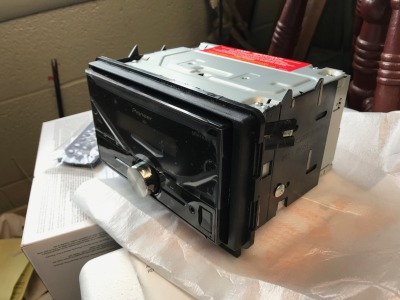
Next, I turned my attention to the new stereo unit itself. I had to get an aftermarket frame and faceplate to connect to the stereo:
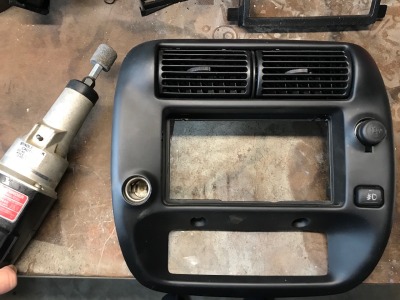
However, it made the face of the stereo larger, and it would no longer fit nicely in the bezel where the old stereo was. SO, I had to get creative.
After donning my mask and ear-protection (okay, they’re headphones - but they worked quite well to dampen the noise), I fired up my rotary tool. I put a grinder bit on it, and then ground away the inside edges of the bezel so that the new stereo would fit nicely inside:
After making a lot of noise and a lot of mess, everything came together quite nicely. I slid the new stereo into the dash, plugged everything in, and gently replaced the bezel:
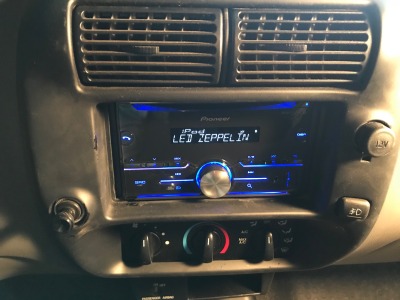
Lastly, I fired it up - and man was I pleased! After fiddling with the instructions for a bit, I was able to successfully pair my phone via the Bluetooth connection. In minutes I was rocking out to some D’yer Maker:
I think that the blue lighting is particularly cool.
So, with a great sense of accomplishment - and a feeling that my dad was hanging out with me the whole time (even though he would NOT have enjoyed the Mos Def playlist that I had going during the project) - I cleaned up my mess and took a shower.
Nevermind that I had already accomplished several loads of laundry and next week’s grocery order before I started.
That is how you Saturday.